
Last updated November 17, 2026
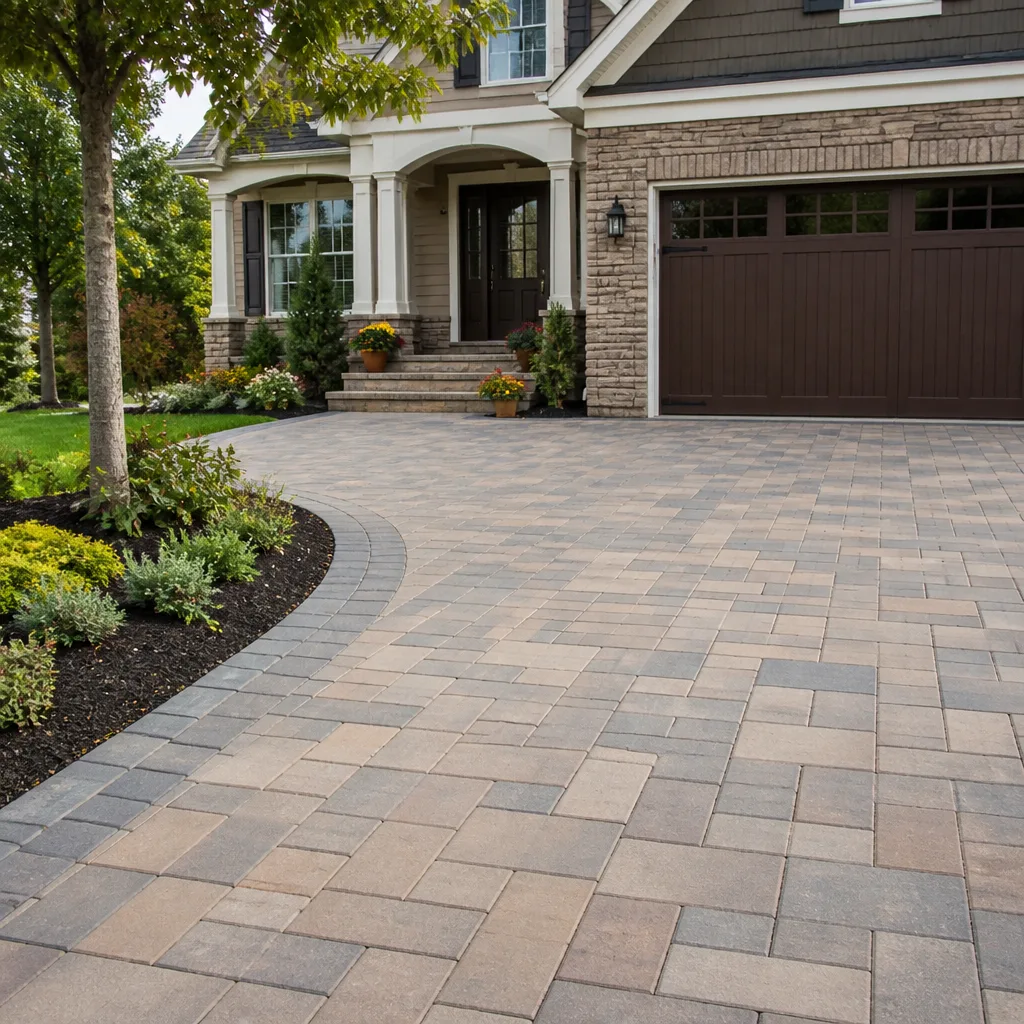 Driveway & pavers
 Kitchen remodeling
 Bathroom remodeling
 Home additions & ADU
 Roofing
 Windows & doors
 Fence
Free written scope consultation - allowances, timeline, and change-order rules on paper before a single trade is scheduled
Driveway & Pavers Troubleshooting in Westminster: Common Problems and How to Fix Them
A rocking paver and a sunken section look like two different problems. They’re usually the same problem, an inadequate base, caught at two different stages. That’s the thing most Westminster homeowners get wrong when they call us: they want the surface fixed. Fill the joint, reset the loose piece, top off the sand. Eighteen months later the same corner is rocking again, because the surface was never the issue. Interlocking concrete pavers are a system, and when one layer of that system is off, the symptom shows up somewhere else. What you’re seeing on top is a message about what happened underneath during installation. This guide is written to help you read that message. We’ll walk through how to tell a base failure from a bedding failure from an edge failure, which repairs are honest and which are a waste of money, and how the specific conditions in a Westminster yard shape all of it.
Quick Answer
Most driveway paver problems in Westminster come down to one of four root causes: a base layer that wasn’t compacted deep enough, bedding sand that was too thick or too thin, edge restraints that weren’t anchored into anything solid, or joint sand that was never given the conditions to cure. Diagnosing which one produced your symptom tells you whether you need a spot fix, a partial rebuild, or to pull the whole affected section. Surface-only repairs almost never hold.
Styles & brands we work with
- Kitchen remodeling
- Bathroom remodeling
- Home additions & ADU
- Roofing
- Windows & doors
- Driveway & pavers
- Fence
Table of Contents
- The Diagnostic Matrix: Which Layer Failed?
- Base Layer Failures: The Rocking Paver and the Sunken Section
- Why Joint Sand Keeps Washing Out on Sloped Westminster Driveways
- Edge Restraint Failures on Narrow Westminster Driveways
- When a Partial Repair Is Sound and When It Isn’t
- Stains and Efflorescence on Concrete Pavers in High UV
- Common Mistakes to Avoid
- When to Call a Professional
The Diagnostic Matrix: Which Layer Failed?
Before you call anyone or buy anything, spend ten minutes watching how the problem behaves. A paver driveway is built up in predictable layers: compacted subgrade, a crushed-stone base, a thin bedding sand layer, the pavers themselves, and joint sand swept into the gaps. Edge restraint holds the whole field in place at the perimeter. When the system is working, all of those layers move together as a single surface. When it’s not, the symptom tells you where the failure started.
Here’s how we read it in the field:
- Individual paver rocks in place, joints look intact elsewhere: bedding sand failure under that unit. Usually a spot where the sand was too thick or never compacted.
- Whole sections heave or dip in a wave pattern: base layer problem. The stone wasn’t deep enough, wasn’t compacted in lifts, or the subgrade wasn’t prepared before the base went down.
- Perimeter pavers walk outward, joints open near the driveway edge: edge restraint failure. The units have nothing stopping them from migrating.
- Joint sand disappears repeatedly, pavers themselves stay put: joint sand application or curing problem, often combined with a slope that sheds water fast.
- Water pools in low spots and stays: a grading problem that may predate the pavers entirely. No amount of re-sanding fixes standing water.
- Fine hairline cracks across multiple pavers at once: point loading from an unstable base, not a defective paver.
Two of these can look identical from standing height. If you’re not sure, get down close and look at the joints. If the joints are tight and the pavers move, it’s subsurface. If the joints are open and the pavers are tight, it’s perimeter. That single check sends you in a different direction on the repair.
Base Layer Failures: The Rocking Paver and the Sunken Section
Base failures are the most common and most expensive category. They’re also the least likely to be fixed honestly by a surface repair. On a properly built driveway, the crushed aggregate base is compacted in shallow lifts so the whole depth reaches density, not just the top inch. When a crew skips a lift or runs the compactor too few times, the base looks fine at handover. Traffic starts working the loose material. Sections settle unevenly over the first few seasons, and the pavers above them can only follow.
A rocking paver is what a base failure looks like when it’s just starting. One unit loses contact with the bedding sand because there’s nothing stable under it, so it pivots. The joint sand cracks loose, water gets in faster, and the failure spreads outward. A sunken section is what a base failure looks like when it’s further along. Same cause, more time.
Here’s the part that matters for your wallet:
- Fixing a single rocking paver by pulling it, re-bedding it and re-sanding is legitimate when the base directly underneath the unit is confirmed solid.
- Fixing a sunken section by simply adding sand and re-laying the pavers on top is a patch, and it usually lasts one or two seasons before it subsides again.
- Any repair where the base has lost density requires excavation back to stable material, re-compaction in lifts, and re-laying the section. There’s no shortcut that survives traffic.
Westminster driveways built on the older lots, particularly around the neighborhoods with the more compact, settled yards, are more at risk of base issues showing up earlier because the subgrade had more time to consolidate before pavers went down. That doesn’t mean the pavers are bad. It means base preparation has to account for what the ground is already doing. When we quote a repair or a full driveway & pavers rebuild, the base depth and compaction are the first line item, not an afterthought.
Our technicians have up to 9 years of experience on this work, and the honest ones will tell you the same thing: pulling pavers to inspect the base is the only way to know what you’re actually dealing with. A contractor who quotes you a repair without looking underneath is guessing.
Why Joint Sand Keeps Washing Out on Sloped Westminster Driveways
Joint sand has one job: lock the pavers together laterally so the whole surface behaves as a sheet rather than thousands of individual units. When it washes out, the pavers start to separate under traffic, the joints widen, and water reaches the bedding sand faster. The surface starts the slide toward base failure, one small step at a time.
On a flat driveway this rarely happens. On a driveway with any grade, which describes a lot of the properties in Westminster, it’s a regular complaint. The sand has to be applied correctly and then given the conditions to actually cure. That’s where a lot of jobs go wrong.
Polymeric sand is the standard joint fill for driveways because it hardens after wetting and resists washing out. But hardening doesn’t happen on its own schedule. The application matters:
- The joints need to be clean and dry, fully dry, before sand goes in. Moisture in the joint prevents the binder in the sand from setting correctly.
- The sand has to be swept in fully and the surface compacted to settle it deeper into the joints.
- Activation requires a controlled wetting: enough water to trigger the binder, not enough to wash sand out before it sets. This is the step most often rushed.
- The surface needs to stay undisturbed while the binder cures. Traffic, vehicles in particular, shouldn’t touch it during that period.
Westminster’s air stays humid a good chunk of the year, and a humid day messes with that wetting step. Sand can look activated while the binder underneath hasn’t fully set, and the first rain takes it. Applying on a low-humidity day and allowing for a longer cure is the honest approach. The brands matter too: Quikrete and Sakrete both make joint sand products that perform well when the application protocol is followed, and poorly when it isn’t. The product isn’t the variable. The process is.
If your joint sand has washed out more than once, get the application checked before you buy another bag. Repeating a failed process gets you the same result.
Edge Restraint Failures on Narrow Westminster Driveways
The perimeter of a paver field carries more load than most homeowners realize. Edge restraint is the concrete or plastic border that runs along the outside of the pavers, anchored into the base, holding the field against lateral movement. Take it away and the perimeter pavers start to walk outward under every load that rolls across them.
Westminster lots tend to be tight, and driveways in the older pockets of town are often narrow. On a narrow driveway, vehicle tires regularly overhang the edge, and vehicle weight lands right on the perimeter or on the restraint itself. Whatever holds that edge gets worked hard, every day. The restraint has to be anchored into the compacted base, not just laid alongside on top of soil. And it has to sit at the right height so the pavers overlap it and lock in, with the restraint spiked or adhered according to the product.
Failure patterns we look for:
- Perimeter pavers visibly shifted outward: restraint was never anchored, or the anchor came loose in soft soil.
- Restraint cracked along the top or lifted: usually a plastic unit that couldn’t handle the load, or a concrete unit that wasn’t embedded properly and is being levered by the pavers moving against it.
- Joints opening in a fan pattern from the driveway end: classic edge failure where the whole field is sliding slightly outward under load.
- Ponding at the driveway entrance: restraint height was wrong, or the grade at the apron wasn’t set correctly on install.
Once perimeter pavers have crept, re-anchoring the restraint alone won’t pull the field back. The affected pavers come out, the restraint is set correctly, and the section is re-laid and re-compacted. On a full rebuild, choosing a heavier-duty restraint unit from a brand that builds driveway-rated products matters more on a narrow lot than on a wide one. When we talk through paver selection, the restraint usually gets more attention from us than the paver color, because that’s where the failures come from.
When a Partial Repair Is Sound and When It Isn’t
Every homeowner wants to hear that a partial repair is the right answer. Sometimes it is. More often than people hope, it isn’t, and getting the honest answer up front saves money later. Here’s how we sort it:
- Pull a representative sample. Remove two or three pavers at the edge of the problem and expose the base. This is the only honest diagnostic. The failure pattern under the pavers tells you whether the base is stable below.
- Check base density under the affected area. If the material under the pavers is still compacted and stable, the failure is confined to the bedding and joint layer. A partial repair is sound.
- Check the perimeter of the affected section. Base failures usually have a margin where the problem hasn’t reached yet. Match the repair boundary to the failure boundary, not to where the pavers look worst.
- Cut the repair line straight. Partial repairs should end on a full paver edge that meets a stable section, with a clean joint. Ragged repair lines fail first.
- Re-examine base underneath and re-compact. If any material is loose, the partial repair becomes a full section rebuild. No way around it.
Where partial repairs make sense: single-paver rocking that started with a bad bedding spot, isolated perimeter edge failures on one end of the driveway, and joint-only problems where the pavers themselves are tight and stable.
Where they don’t: any sunken area because the base underneath has lost density, any failure that spans more than a few pavers in a wave pattern, and anything near the driveway apron where water sits and traffic load is highest. Pulling the whole affected section and doing it right is cheaper than repairing the same section twice.
If you’re planning a larger exterior upgrade that includes fencing or a gate at the driveway edge, coordinating the timeline matters. A new fence installation can affect the grading and drainage at the driveway perimeter, and the two projects should be sequenced together rather than run separately.
Stains and Efflorescence on Concrete Pavers in High UV
Concrete pavers in a sunny climate get a certain patina over time. Most of it is harmless. Some of it is a warning. Telling the difference matters, because aggressive cleaning products can void the manufacturer’s warranty on the paver surface, and once that finish is damaged, the paver starts aging faster than its neighbors.
Three categories of stain show up on Westminster driveways:
- Car-related stains: oil drips, tire marks. Usually want a degreaser and patience. Hot water and a scrub brush work better than harsh acid on most of these.
- Organic stains: leaf tannin, dirt, mild mildew. These lift with a light detergent and pressure, at low settings.
- Efflorescence: a white, powdery bloom that appears on the surface, often after rain. It’s mineral salts moving through the concrete and evaporating at the surface. It’s cosmetic. It’s not structural. And it usually goes away with time and good drainage.
Efflorescence is the one to be careful with. The temptation is to pressure-wash hard or acid-etch it off. Pressure washing at high settings strips the paver surface and opens the pores, which lets more moisture in and can set the paver up for another bloom. Acid-based cleaners used incorrectly permanently alter the paver finish and can void a manufacturer’s warranty. The right sequence is lighter: dry-brush first, then a manufacturer-approved efflorescence cleaner, then a full rinse, and then address the drainage if the bloom keeps returning. Where efflorescence is chronic, water is getting into the pavers from somewhere it shouldn’t. Fix the source and the bloom stops.
On high-UV aspects, the challenge is different. Sun exposure fades color over years, and there’s no cleaning product that brings it back. If you’re concerned about UV fading on a driveway that faces the sun all afternoon, that’s a paver selection issue at the planning stage, not a maintenance fix. It’s one of the reasons we walk through paver options with clients before install, including lines from Belgard, Unilock and Techo-Bloc that hold color differently over time. The choice of color and finish matters on a sunny driveway.
Common Mistakes to Avoid
- Topping off sunken sections with sand and re-laying the pavers. This works for a few months, then the same subsidence returns because the base underneath still isn’t compacted. Any sunken area needs the base addressed, not the surface.
- Re-sanding joints without cleaning them out first. If there’s old sand, dirt or organic debris in the joint, new polymeric sand can’t bind to the edges. The application fails on contact.
- Applying polymeric sand on a humid Westminster morning. The wetting step is where most failures happen. Humid air keeps the binder from setting properly, and the first rain takes the sand.
- Patching an edge failure without re-anchoring the restraint. Perimeter pavers will walk outward again as soon as vehicle weight crosses the edge. You’ll be pulling the same pavers a season later.
- Pressure washing at full strength to clean stubborn stains. High-pressure washing can strip the surface of concrete pavers and open the pores for more water intrusion. Efflorescence comes back faster, and manufacturer warranties can be voided by damage.
- Ignoring the grading around the driveway perimeter. Water has to leave the driveway surface in one direction. If the surrounding grade holds water against the pavers, no joint sand in the world resists it.
- Skipping the base inspection when the quote is low. A repair quote that doesn’t involve pulling pavers to check the base isn’t a repair quote, it’s a surface touch-up. It’ll cost you more in the long run.
When to Call a Professional
Some paver problems are honest DIY territory: sweeping joint sand back in after a heavy rain, brushing off a leaf stain, pulling a single paver that rocks and confirming the bedding under it. Some aren’t. Call a professional when the failure pattern spans more than a couple of pavers, when water pools and stays, when the perimeter has shifted, or when you can’t identify which layer failed. The other situation that warrants a call is a driveway you’re about to put a vehicle on regularly and aren’t sure is structurally sound. Getting a proper diagnosis before a partial repair avoids paying for the same fix twice.
Denali Contractors offers free estimates in Westminster. Call (833) 749-1562. Estimates are itemized and written, and the written estimate sets the final price. Our technicians have up to 9 years of experience diagnosing and repairing paver driveways across West Orange County. For larger property upgrades that pair a paver driveway with other exterior work, we also handle home additions & ADU projects on the same property under a single contract, so grading, drainage, and site work can be sequenced properly.
See the difference
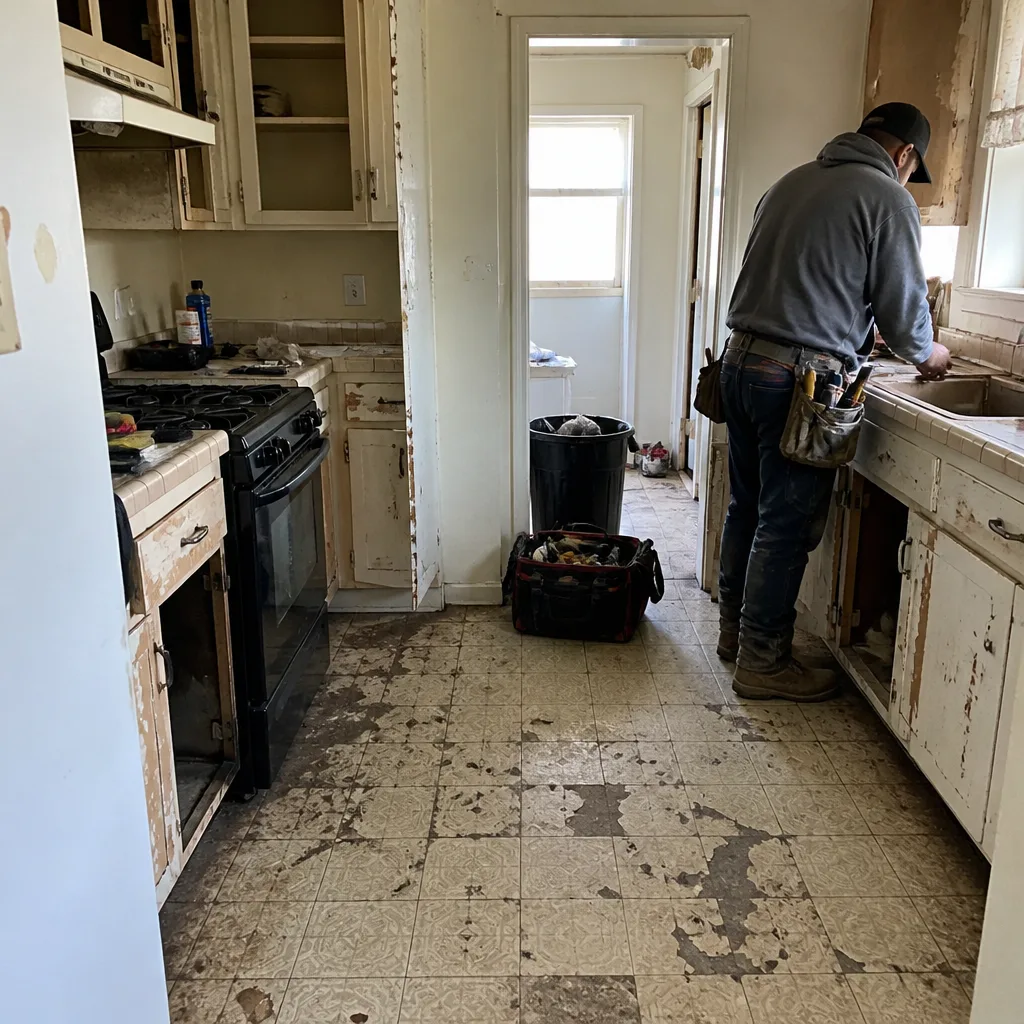 Before
 After
 Before
 After
 Before
 After
Frequently Asked Questions
Paver driveway repairs in Westminster typically run higher than homeowners expect because honest repairs involve pulling pavers and addressing the base, not just filling joints. Expect a written estimate that itemizes the base work separately from the surface work, with the final price set by that estimate after diagnosis. Small spot repairs of a single rocking paver are at the low end; a partial rebuild of a sunken section is significantly more. Call (833) 749-1562 for a free estimate. The written quote is the answer, and we don’t do repairs without pulling pavers first to see what’s underneath.
Because re-sanding addresses the joint, not the cause. A paver rocks when the bedding sand under it has lost contact or the base underneath isn’t compacted. New joint sand might hold the unit in place for a few months, then traffic works it loose again and the joint opens. The fix requires pulling the paver, confirming the base is stable, re-bedding it correctly, and re-compacting. If the base under the paver has failed, that paver’s neighbors will start rocking soon. Call (833) 749-1562 for a free estimate and a proper diagnosis.
Look at the pavers, not the joints. If the pavers themselves are tight and stable and only the joint sand is disappearing, it’s a joint sand application or curing problem, often aggravated by slope. If the pavers are starting to separate, the joints are widening unevenly, or sections of the driveway are dipping, the problem is beneath the pavers and joint sand won’t fix it. Call (833) 749-1562 and we’ll diagnose which one you’re dealing with. Estimates are free.
Often, yes. A partial repair is the right answer when the base underneath the affected area is confirmed stable, when the failure boundary is confined to a defined section, and when the repair line can end on a full paver edge that meets a stable section. Partial repairs don’t make sense on wide, wave-patterned failures or on any section where base density has been lost. Diagnosis always begins with pulling a small sample to see what’s underneath. Call (833) 749-1562 to schedule a free estimate and see what your driveway needs.
Efflorescence is mineral salt moving through the concrete and evaporating on the surface, and it shows up as a white, powdery bloom. It’s cosmetic, not structural, and it usually fades with time. Chronic efflorescence means moisture is getting into the pavers from somewhere, often the joints, the base drainage, or the surrounding grade. Aggressive acid washing or high-pressure washing can permanently damage the paver finish and void the manufacturer’s warranty, so it should be handled with manufacturer-approved cleaners after the source of the moisture is identified. Call (833) 749-1562 to have it looked at.
Yes, if the edge restraint is part of the failure. Perimeter pavers walk outward when the restraint isn’t anchored into the base, and re-laying the pavers without fixing the restraint means the failure returns. On a narrow Westminster driveway where vehicle tires regularly cross the edge, the restraint carries more load than usual and re-anchoring is not optional. Call (833) 749-1562 for a free estimate that itemizes edge repair separately from the paver work.
The Bottom Line
Most driveway paver problems in Westminster trace back to a decision made during installation, not a material failure. A base that wasn’t compacted deep enough, joint sand that never cured properly, edge restraint that wasn’t anchored, or bedding that was too thick. Reading which of these caused your symptom is the difference between a repair that lasts and one that comes back. A rocking paver and a sunken section aren’t two problems. They’re the same problem. Getting a written diagnosis before any work starts is the only honest way to price a repair, and it’s the reason we don’t quote pavers without pulling a sample.
If your driveway is showing any of the patterns in this guide, call Denali Contractors at (833) 749-1562. Estimates are free, itemized, and set the final price. We handle paver driveways alongside roofing, windows, fencing, kitchens, bathrooms, and ADUs across Westminster and West Orange County, so property upgrades that touch more than one trade stay under one contract and one accountable crew.
Written by the team at Denali Contractors.